Product: LABEL MATRIX
Version: All Versions
If you are using .dbf files, these file types are no longer supported by Microsoft. In order for the software to recognize them a specific driver needs to be installed, Visual FoxPro. It is strongly encouraged to convert the data into Excel or Access if possible. An article discussing converting .dbf to excel can be found here.
Newer versions of Microsoft Office (2013 or 365) will sometimes fail to install the appropriate OLE driver for the database connection. That driver is the "Microsoft Office 12.0 Access Database Engine OLE DB Provider". Information about updating the Microsoft Access Database Engine (ACE Driver) can be found here.
Here is a way to try attaching the database file using an Advanced Setup. (It is recommended to do this running the software with Admin credentials)
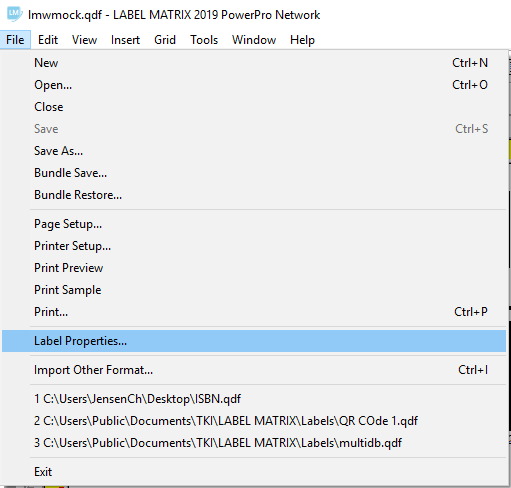
1. Launch the LABEL MATRIX software and navigate to File > Label Properties.

2. Select the Database tab.

3. Click the Reanalyze button.

4. Select the Advance Setup option and click Next.

5. Choose the Select an OLEDB Provider check box. Click Next.

6. Choose the Microsoft OLEDB Provider for ODBC Drivers. Click Next.

7. Choose the Advanced ODBC Selection. Then click on the Select button.

8. Select the Machine Data Source tab and click New.


9. Select System Data Source and click Next.
NOTE: If the software was not Run as Administrator, selecting the System Data Source may not be an option

10. Select a compatible ODBC Driver and then Click Next. On the following page click Finish.
NOTE: For this example an Excel driver was chosen. If no ODBC drivers are shown in the Advanced Setup, then ODBC may be corrupt.


11. Enter a name in the Data Source Name box. Enter a Description if you would like. Click OK.

12. On the Machine Data Source tab select the Data Source Name that was just created. Click OK.

13. Select the Directory the database is located in on the right column. In the left column select the database from the File list. Click OK.

14. The name of the database should now appear in the text box underneath Advanced ODBC Selection. Click Next.

15. Select the right table for the database and click Next.

16. Check to ensure that the first record of the database is showing. Click Next.

17. Select a method of accessing the data. Click Next.
NOTE: If you selected Keyed Access, Primary or Unlimited, the next screen will give choices of how the key will be selected. Click Next and then set the Primary keyed field.

18. Here you can give the database a name, it will default to the database's table name. Add a description if desired. Click Finish.

19. On the Database tab the database connection will be displayed. Click OK.

20. Open up the Data Grid to view the data for accuracy.


